Experiments in gold leafing/gilding leather – Part 1

I have been working on an ongoing project to discover exactly what the best way is to apply gold leaf (real gold) to flexible leather projects with a sealant that will keep it flexible but protected from scratches.  Gold leafing is an art all on its own.  A few reference I have found are:

Gilding Leather Carving

Gold Leafing Technique

Gilding on Leather

Most of the resources (except the first one) was about gilding on leather book bindings which is pretty different from gilding tooled veg tanned leather.

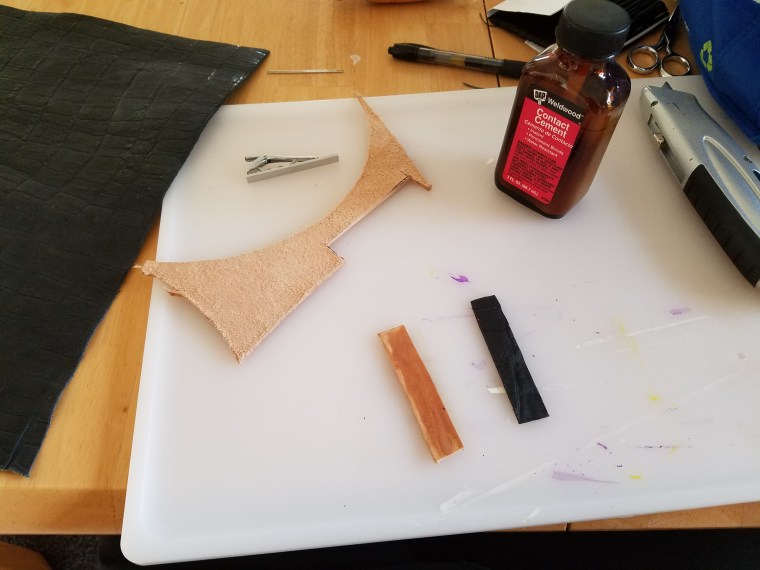
I started with picking up a few supplies.  I bought some patent gold leaf (the leaf is gently adhered to tissue paper which makes it easier to work with) from amazon , got some cotton gloves to keep the leaf from sticking to my skin (jury is out on whether these are actually helpful or not), a makeshift gilder’s knife (a butter knife from my kitchen), and an agate burnisher (also unsure if this is necessary at this point.  Haven’t had much luck with it)

20160918_205049

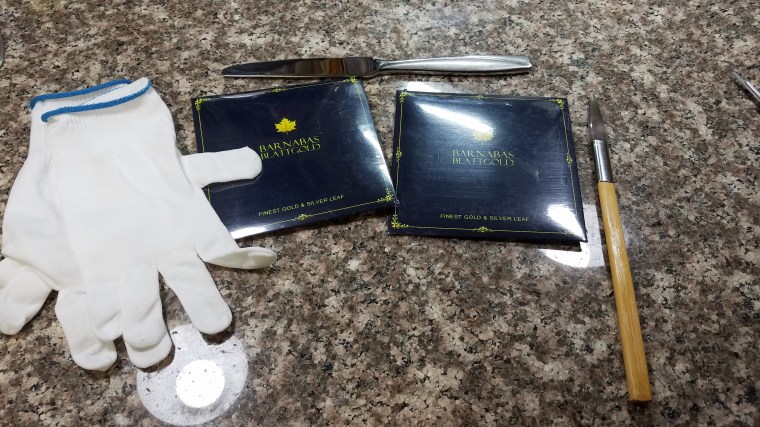
I also picked up two different gilder’s sizes (adhesive).  Mona Lisa from Amazon and Kolner Miniatum.  As well as four kinds of sealants based on my research and browsing the hardware store.  I also tried regular Resolene leather finish on another attempt.

20160921_180414

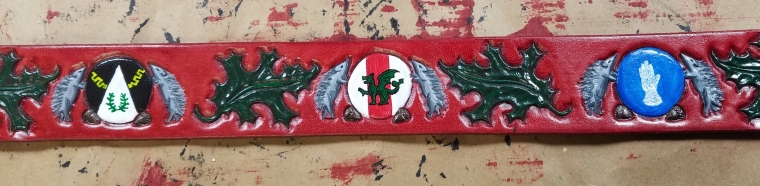
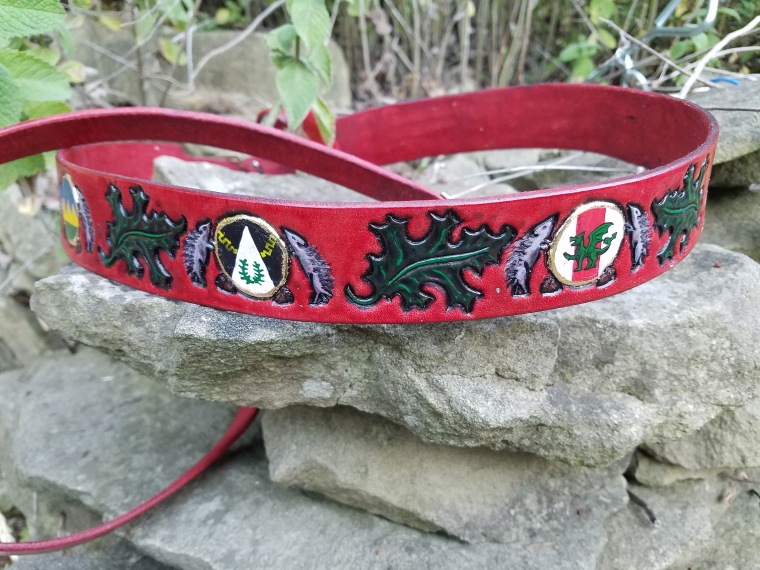
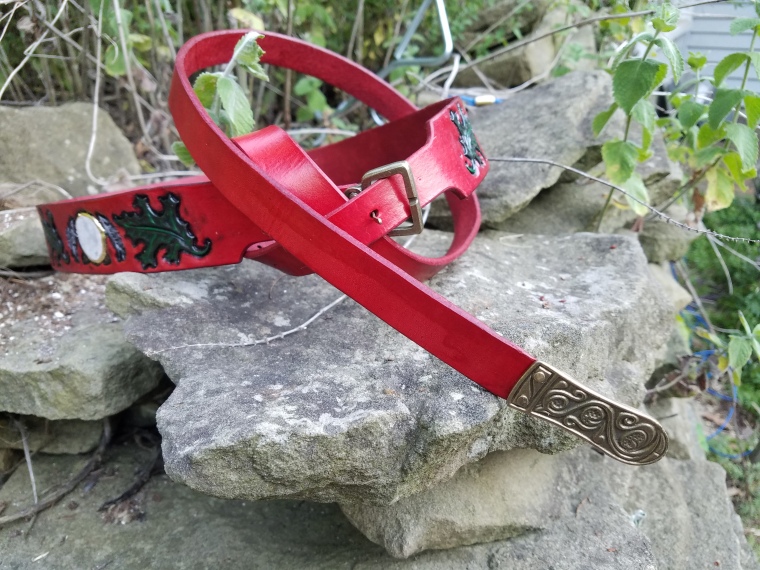
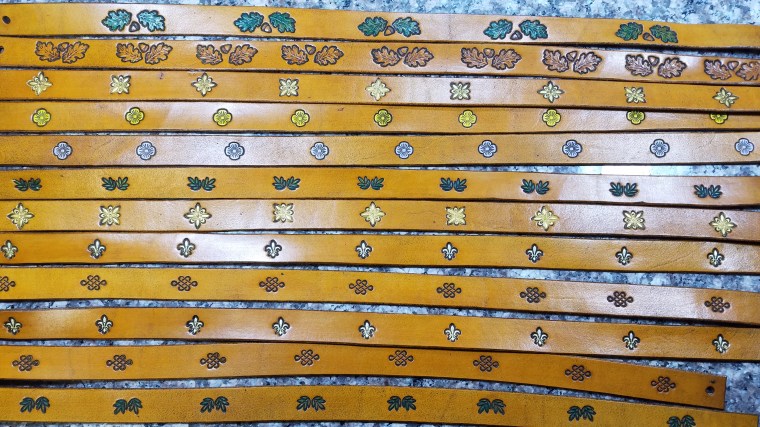
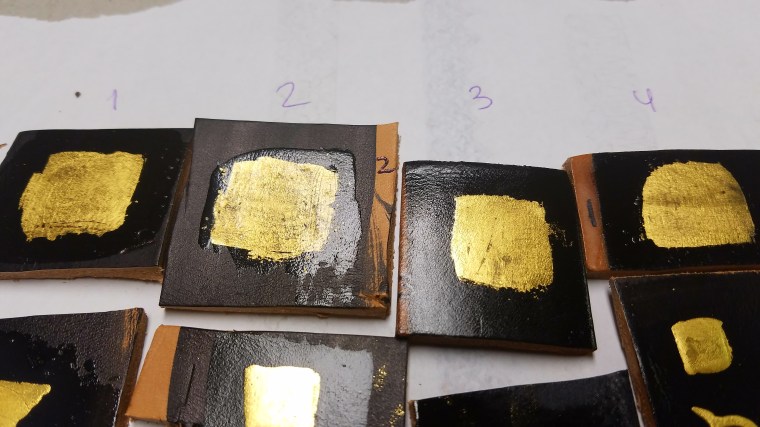
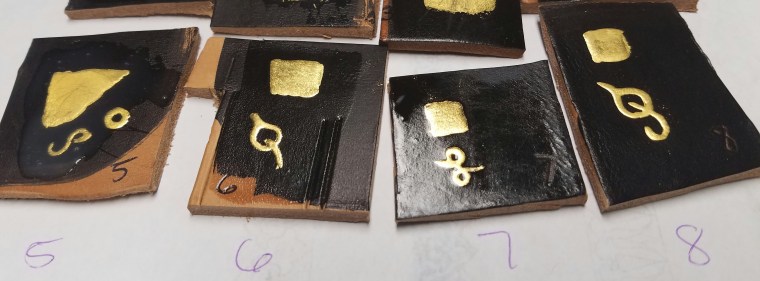
Some test samples of leather gilding combinations.

1. Mona Lisa Gilding Size and Spray Polyurethane
2. Mona Lisa and Leak Seal
3. Mona Lisa and Pledge Floor Finish
4. Mona Lisa and Polycrylic
5. Miniatum and Leak Seal
6. Miniatum and Polycrylic
7. Miniatum and spray polyurethane
8. Miniatum and acrylic resolene

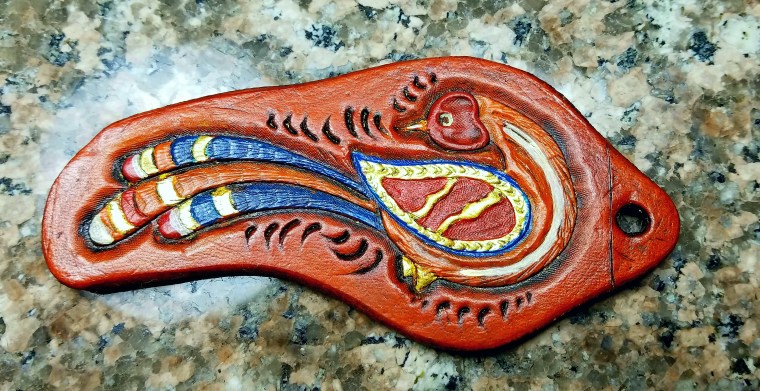
The miniatum won hands down for beauty. The gold was so much smoother and more shiny. It looks like liquid gold on the leather. The Mona Lisa Gilding size was flatter and the gold was dull and not as impressively shiny.

As far as the sealers go… Leak Seal is right out because it causes the gold to bubble. I gave up on the floor finish because I didn’t like how you have to apply it and it didn’t make a very resilient finish. The spray Polyurethane worked well but I don’t like the fumes from applying it. It needs several coats but I was pleasantly surprised that it remained flexible and didn’t crack when I flexed the leather. Resolene worked as well but many coats are required to project the delicate gold from scuffing. I think the polycrylic worked the best. It actually enhances the shine of the gold, is easy to apply, requires only a few coats, and remains flexible and doesn’t crack.

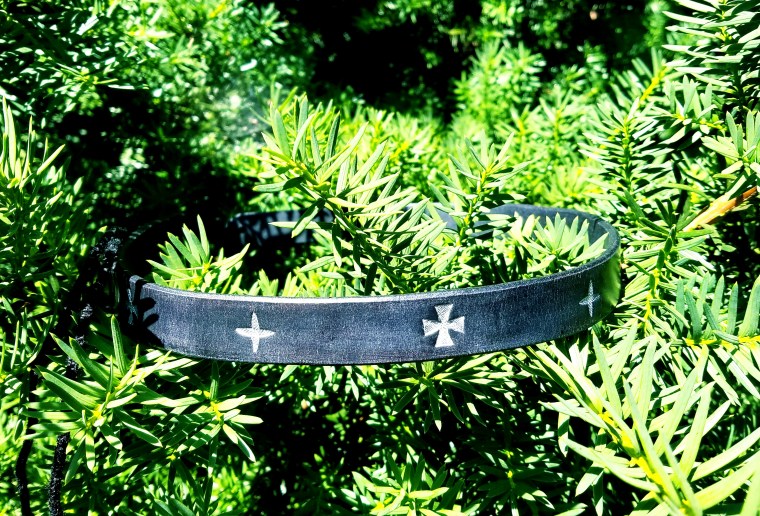
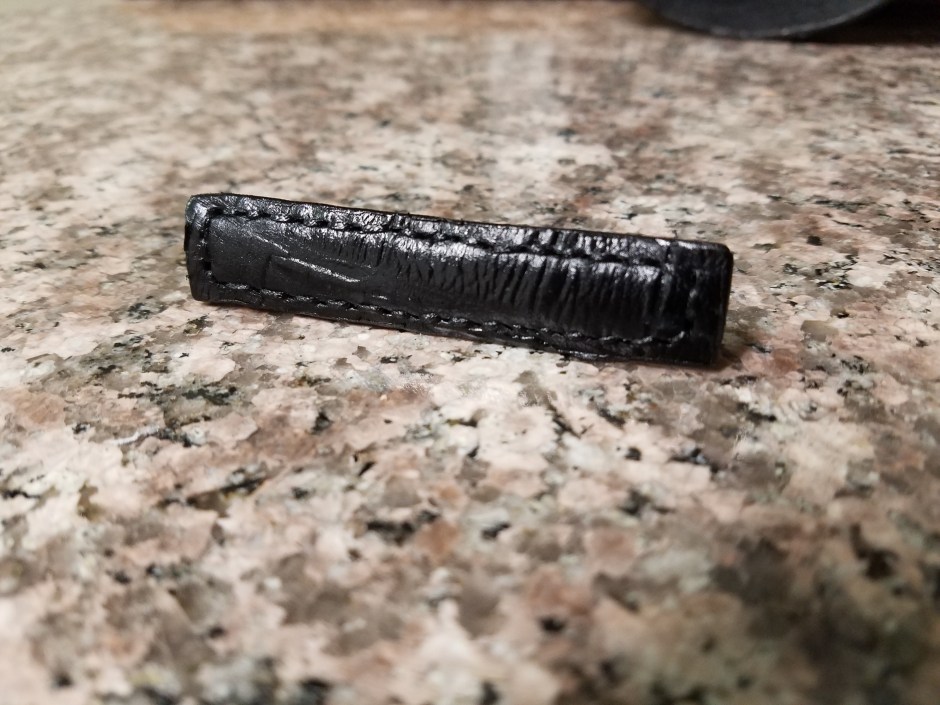
Also, as a side note… don’t bother with fake gold leaf… it pales in comparison with real gold leaf. The fake gold leaf looks ok until you compare it to real gold… The real gold just blows you away with it’s beauty.

20160926_202151

20160926_202322

20161018_220632

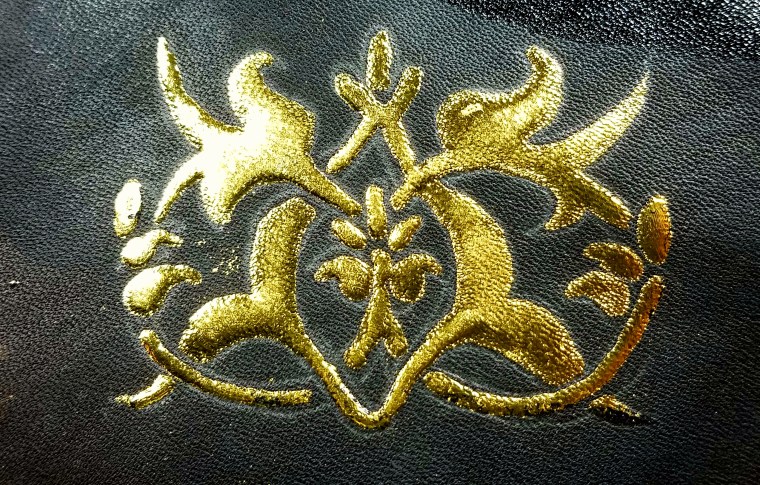
example of fake gold leaf below…  Still shiny, but not near as vibrant as the real gold leaf.

20160904_173710

Squire’s Belt Step-by-step

February of 2016 I was offered a squiring by Sir Devon of Ayr which I accepted.  Around the same time he had offered to another friend who also accepted.  For this friend and myself, Sir Devon and I wanted to make nice dress belts for court and more functional belts for fighting.  I haven’t had the chance to work on mine but here is documentation of the process of making the other.

My first step was to interview the recipient about what he would like.  We discussed that he finds oak leaves and hedgehogs important to him and intends to incorporate them into his device when he gets that far.  I also suggested an idea that I had had about putting a sequence of devices from any affiliations he has as sort of a unique “gate address” as it were.  His affiliations would be the Middle Kingdom, Pentamere, Barony of Andelcrag, Canton of Three Hills, and, of course, his new knight, Sir Devon of Ayr.  That is 5 affiliations plus two blank ones to fill in later (presumably for a Laurel and Pelican should he decide to go in those directions.  The blank two could be for whatever he so chooses and I could add them later.

With that information I began the designing process which took some time.  I submitted several renditions to him and had him choose the one he liked most.

I started with a fantastic quality, extra long Herman Oak 1.5″ strip.

Once I got the design tooled and the base red color stained, it was time to paint the design.  I use Angelus leather paints (Amazon link).  I have had very good luck with these paints.  They dry flexible so are fantastic for leather since they don’t crack or flake off.  They are designed for fixing scratches on shoe leather so they are very resistant to scratching off.  They are also water-based so they are easy to clean up and they also mix well together so you can mix up whatever colors you want.

20160607_144325


I used black antique gel from Tandy to highlight the hedgehogs and leaves.  After that I ended up going back and highlighting the leaves with a lighter green so they didn’t seem like a black hole compared to the rest of the design.  The antique really darkened them a lot.

I purchased a replica, period-accurate buckle and belt end and attached them with the included rivets.  I then burnished the edges.  As a final design step, I decided to gold leaf around the edges of each device.  You can see the results of that in the final pictures below.  I finished the belt with many layers of Resolene to protect the design and then a few layers of Carnauba Cream to give it a nice smell and buffed it to a shine.  The finished product is below.  He beamed when I gave it to him.  I kept the final design and results hidden from him until the squiring ceremony and also whipped up a little linen bag for him to store it in and protect it.


20160705_20190320160705_201819


A couple small projects

I have been working on one big project for quite a while now and took breaks here and there to do some fun smaller items for friends.

My good friend and squire brother Thelvald was in for a surprise this last Pennsic.  Nobody realized he never got his Award of Arms even though he has been playing for many years.  Many of us decided that that needed to happen at Pennsic.  We all sent in recommendations and I volunteered to make a circlet for him along with a local Baroness/laurel who offered to make a scroll for him.  Here is the circlet that I created.  It was a quick project but very rewarding.  I simply took a strip of medium leather (probably 6 or 7 oz.) and used a backgrounder to make the stars.  Then dyed it black and coated it several times with Carnauba Cream.

20160716_125638

The next project was a gift for a new friend who just started in the SCA a few months ago.  She has been doing an awesome job so I decided to make her a little something.  It also allowed me to practice with paint on leather and the gold leaf process I have been working on.  Here is a picture of this beauty.  I am very happy with how it turned out.  The design has special significance to her.  Yes, that is really 24k gold leaf.  I will be having several posts about my explorations into gilding leather.  It is a practice in and of itself with little documentation that I can find online.

20160922_204201

The last project I will document here is a set of circlets I made to donate to the largess coffers of their Majesties of the Middle Kingdom.  There was a challenge set forth to be met at the fall crown tourney a few weeks ago.  The challenge was to make a dozen pieces of largess to donate and the one that got the most votes from the populace would get a prize.  Here is my entry.  I didn’t win but I did get quite a few votes so that pleased me.  Overall, it wasn’t about winning, it was simply about supporting the dream.

20161014_201614

Alligator skin tie clip

Here is a fun little project I decided to attempt for my supervisor at work.  He came in my department last week with his tie flapping around and laying backwards.  I teased him that he needed a tie tack.  This gentleman went alligator wrestling last summer and so I thought it would be a neat/fun project to attempt to make him a tie clip with alligator skin.  So… I ordered the stuff and it came today.  Here is my first attempt which I am actually pretty pleased.  It took me about 2 hours to finish and about $10 in materials.

My first step was to collect the materials I would need.  Needles and thread, a super sharp sewing awl, contact cement, some scrap leather to mount the thin alligator hide to, a knife, the alligator hide, and the tie clip.

I simply cut a piece of the scrap and alligator hide to the same size a little bit wider and longer than the tie clip and glued the two pieces together.

20160329_183441

I then used the awl to punch the holes with the leather being held in my handy stitching horse.

20160329_184456

Then I used the contact cement again to glue the tie clip to the back of the two pieces of leather and began sewing in a way that criss crossed back and forth across the tie clip to keep it secure.

20160329_191642

20160329_191649

20160329_192555

After some black dye for the back side of the veg tan leather and some edge finishing by gently sanding the edges flat with my dremel and then burnishing the moistened edges with my edge burnisher to get them smooth… We have a really sharp looking alligator skin tie clip.  ^_^  I think it turned out really well!  I am excited to give it to him tomorrow.

20160329_193654

20160329_193703

Clamshell gauntlets, part 2

Here are the final steps I took to make my gauntlets.  So far we have patterned, cut, formed, stained and wax hardened the heavy leather.  We then riveted and sewed the pieces together to form the gauntlets.  The next steps are to add straps, add padding, and sew the gloves in.

I have to admit that I wasn’t happy with the orientation of the thumb pieces.  I ended up drilling one of the rivets out and rotating the thumbs a bit to make the space between the thumb and fingers so a piece of rattan can be held more easily.

Anyway, what I did last night was start by adding a strap across the palm.  I just used some scraps of flexible chrome tanned garment leather.  We will see if it can hold up to the abuse.  I simply cut a strip, drilled holes for the stitching, and used a blunt harness needle and some of the waxed, braided nylon thread to saddle stitch the strap to the glove on each side of the palm.

Before sewing the glove in, I cut some strips from the black 6mm yoga mat I have for padding.  I duct taped it into the glove behind the palm, thumb, and fingers.  I really love this yoga mat for padding.  It is anti-microbial and excellent at absorbing force.  I just ordered a mat off Amazon.com and it is going to last me for quite some time.

Next I sewed the gloves in.  I really like how this part turned out.  Initially I was concerned that the gaunlets were too floppy and didn’t stay in position.  Sewing the gloves in really added stability to them and makes me much more comfortable in wearing them.

Really, I am quite satisfied with how they turned out.  We will see how they perform on Monday’s practice. 🙂

image

image

image

image

image

Clamshell gauntlets, post 1

Greetings all!

I am attempting to make a set of gauntlets for myself so I can begin to learn spear and possibly polearm.  I requested a pattern from a friend who had a set that seemed easy and reduced the size by about 20% because my hands are much smaller.  I cut the pieces (Making sure to flip over the hand and thumb pieces on the second piece for the right and left hand) from a piece of heavy saddle skirting that I had laying around.

image

After cleaning up the edges and scraping the flesh side down, soaked the leather for a minute or so in water and then I molded them to my hand roughly and let them dry atop our dehumidifier.  I am sorry but I forgot to take a picture of this stage.

image

After they dried, I stained them a flat black color with Tandy professional water based dye.  For hardening, my waxing process is descrbed below:
1. Gently melt canning wax in a junk pot on a stove covered in tin foil to catch the drips.
2. Warm leather on tin foil covered trays in an oven set to the lowest setting it will go.  I think mine is 200 degrees.  Make sure the leather is quite warm all the way through.
3. Take the leather out of the oven and paint the wax on each side of each piece with a junk paint brush.
4.  Put it back in the oven and watch it until all the wax has soaked in.  Repeat the above steps several times until no more wax soaks into the leather.  You can also just dip the pieces into the pot of wax instead of painting.  It is faster this was but you have to be careful not to get too much wax on the pieces or the wax won’t soak in.  It will pool and harden on top of the leather instead of inside it.

Leave the waxed pieces to harden overnight (or at least for a couple hours).  In the morning, your leather should be hard like plastic with a nice waxy, silky sheen to it.

image

The leather I used was Tandy crappy leather and was an inconsistant thickness.  I was unhappy with the hardness of my pieces and since I am kind of fond of my hands not smooshed, I recuited my machinist brother to whip out a couple pieces of aluminum to reinforce two of the hand pieces.

image

Anyway, the next step is to sew and rivet the pieces together.  First I sewed the cuff to the palm.

image

I used the smallest drill bit I had and just drilled a series of wholes in each side to be joined.  Then, using two blunt harness needles and some waxed, braided nylon thread, I sewed the pieces together with a stitch similar to saddle stitch bbut that creates an “x” on one side and straight lines on the inside.  I also had to restain the wholes I drilled with black dye to make them not stand out.

image

Next I worked on riveting the moving pieces to the cuff.  I am using copper rivets purchased from Brettun’s Village and a little bit larger drill bit to drill the holes.

image

image

They look pretty good so far!  I am pleased.  Time for bed though.  Thanks all for looking ay my very first post.  I hope to document all my crafting adventures here!  Don’t forget, I am open to commissions, if you need anything made!