A couple small projects

I have been working on one big project for quite a while now and took breaks here and there to do some fun smaller items for friends.

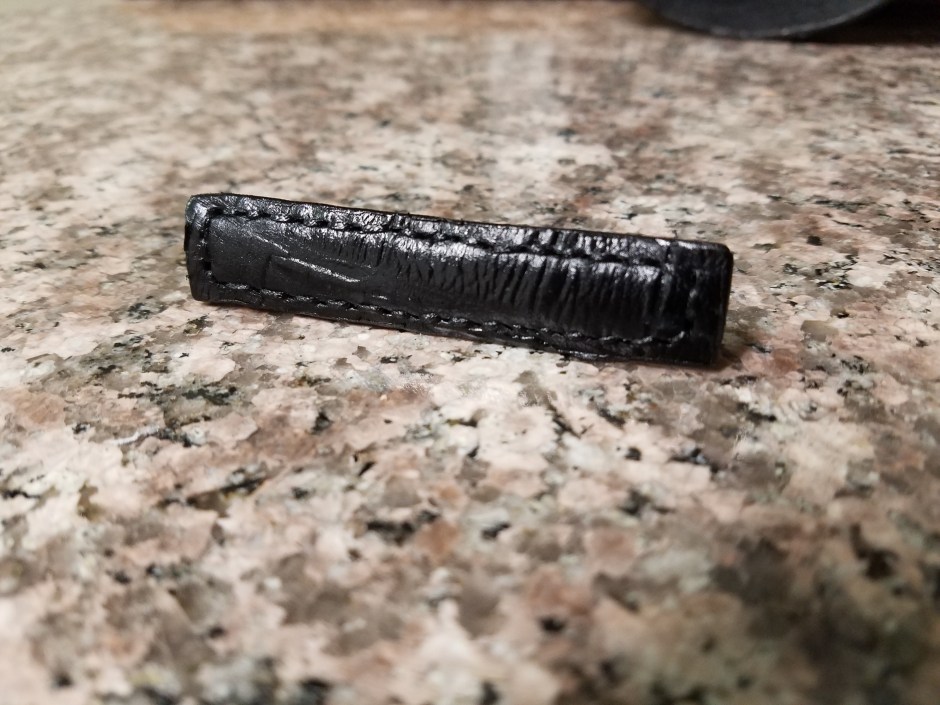
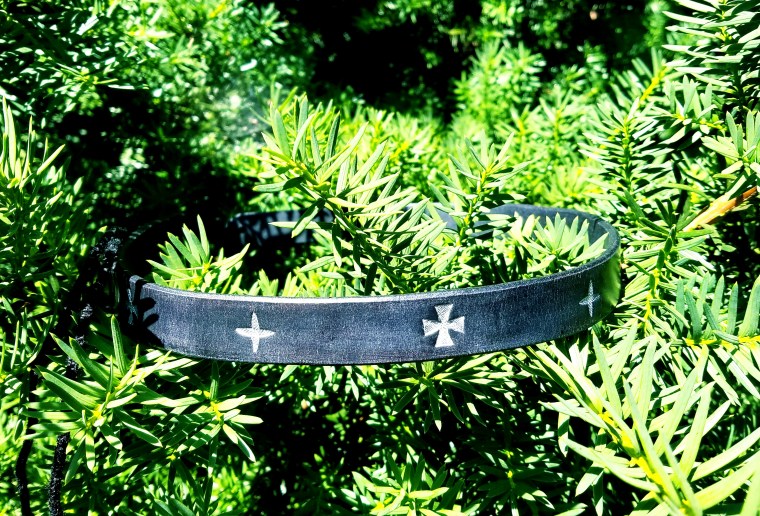
My good friend and squire brother Thelvald was in for a surprise this last Pennsic.  Nobody realized he never got his Award of Arms even though he has been playing for many years.  Many of us decided that that needed to happen at Pennsic.  We all sent in recommendations and I volunteered to make a circlet for him along with a local Baroness/laurel who offered to make a scroll for him.  Here is the circlet that I created.  It was a quick project but very rewarding.  I simply took a strip of medium leather (probably 6 or 7 oz.) and used a backgrounder to make the stars.  Then dyed it black and coated it several times with Carnauba Cream.

20160716_125638

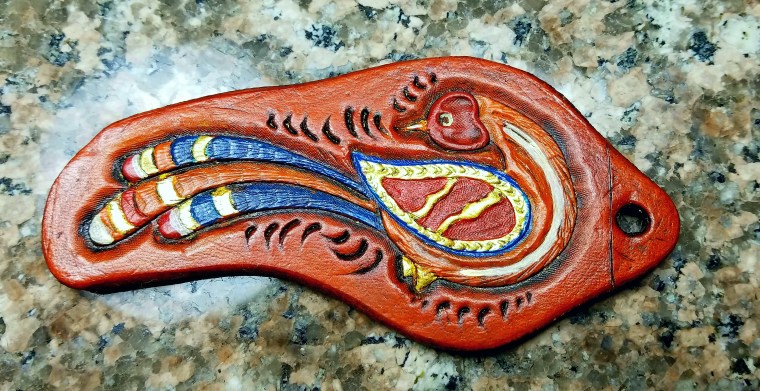
The next project was a gift for a new friend who just started in the SCA a few months ago.  She has been doing an awesome job so I decided to make her a little something.  It also allowed me to practice with paint on leather and the gold leaf process I have been working on.  Here is a picture of this beauty.  I am very happy with how it turned out.  The design has special significance to her.  Yes, that is really 24k gold leaf.  I will be having several posts about my explorations into gilding leather.  It is a practice in and of itself with little documentation that I can find online.

20160922_204201

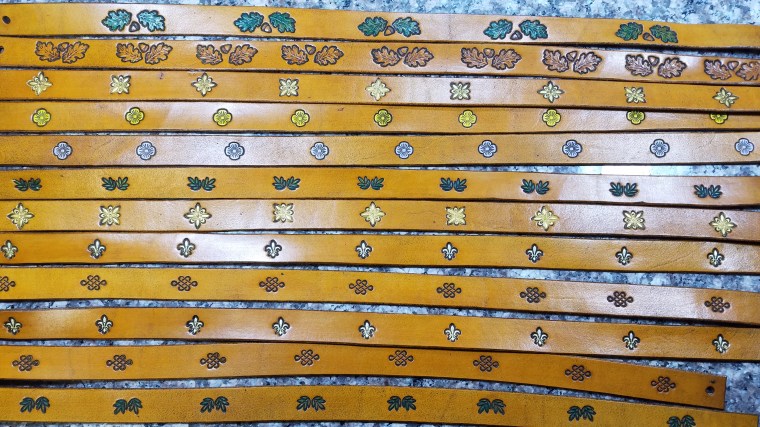
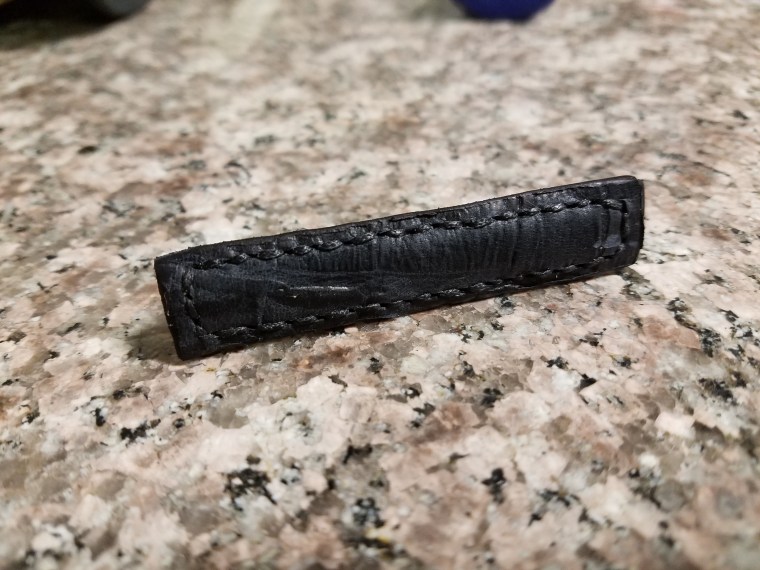
The last project I will document here is a set of circlets I made to donate to the largess coffers of their Majesties of the Middle Kingdom.  There was a challenge set forth to be met at the fall crown tourney a few weeks ago.  The challenge was to make a dozen pieces of largess to donate and the one that got the most votes from the populace would get a prize.  Here is my entry.  I didn’t win but I did get quite a few votes so that pleased me.  Overall, it wasn’t about winning, it was simply about supporting the dream.

20161014_201614

Advertisement

Alligator skin tie clip

Here is a fun little project I decided to attempt for my supervisor at work.  He came in my department last week with his tie flapping around and laying backwards.  I teased him that he needed a tie tack.  This gentleman went alligator wrestling last summer and so I thought it would be a neat/fun project to attempt to make him a tie clip with alligator skin.  So… I ordered the stuff and it came today.  Here is my first attempt which I am actually pretty pleased.  It took me about 2 hours to finish and about $10 in materials.

My first step was to collect the materials I would need.  Needles and thread, a super sharp sewing awl, contact cement, some scrap leather to mount the thin alligator hide to, a knife, the alligator hide, and the tie clip.

I simply cut a piece of the scrap and alligator hide to the same size a little bit wider and longer than the tie clip and glued the two pieces together.

20160329_183441

I then used the awl to punch the holes with the leather being held in my handy stitching horse.

20160329_184456

Then I used the contact cement again to glue the tie clip to the back of the two pieces of leather and began sewing in a way that criss crossed back and forth across the tie clip to keep it secure.

20160329_191642

20160329_191649

20160329_192555

After some black dye for the back side of the veg tan leather and some edge finishing by gently sanding the edges flat with my dremel and then burnishing the moistened edges with my edge burnisher to get them smooth… We have a really sharp looking alligator skin tie clip.  ^_^  I think it turned out really well!  I am excited to give it to him tomorrow.

20160329_193654

20160329_193703

Clamshell gauntlets, part 2

Here are the final steps I took to make my gauntlets.  So far we have patterned, cut, formed, stained and wax hardened the heavy leather.  We then riveted and sewed the pieces together to form the gauntlets.  The next steps are to add straps, add padding, and sew the gloves in.

I have to admit that I wasn’t happy with the orientation of the thumb pieces.  I ended up drilling one of the rivets out and rotating the thumbs a bit to make the space between the thumb and fingers so a piece of rattan can be held more easily.

Anyway, what I did last night was start by adding a strap across the palm.  I just used some scraps of flexible chrome tanned garment leather.  We will see if it can hold up to the abuse.  I simply cut a strip, drilled holes for the stitching, and used a blunt harness needle and some of the waxed, braided nylon thread to saddle stitch the strap to the glove on each side of the palm.

Before sewing the glove in, I cut some strips from the black 6mm yoga mat I have for padding.  I duct taped it into the glove behind the palm, thumb, and fingers.  I really love this yoga mat for padding.  It is anti-microbial and excellent at absorbing force.  I just ordered a mat off Amazon.com and it is going to last me for quite some time.

Next I sewed the gloves in.  I really like how this part turned out.  Initially I was concerned that the gaunlets were too floppy and didn’t stay in position.  Sewing the gloves in really added stability to them and makes me much more comfortable in wearing them.

Really, I am quite satisfied with how they turned out.  We will see how they perform on Monday’s practice. 🙂

image

image

image

image

image